We decided to add a battery monitor to our conversion van camper. Basically, the battery monitor lets you know how much juice is left in the batteries — i.e. what the State Of Charge is. This helps you decide when your battery needs a charge, whether you are likely to still have some juice left in the morning, and helps you avoid discharging your battery too deeply (which will shorten its life).
Capabilities
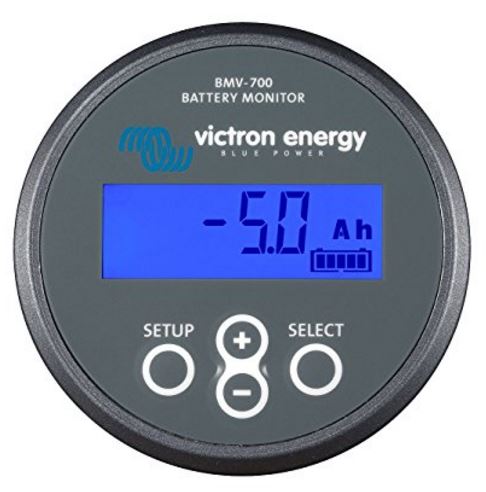
The monitor we decided on is the Victron 700.

Another popular brand is the TriMetric.
The Victron displays SOC (State of Charge) as a percentage, remaining hours of use, amp-hours used since full charge, electrical current going into or out of battery, and battery voltage. The various values are accessed by pressing the + key.
The value you will probably use the most is the State of Charge. This tells you at a glance how much juice your battery has left. It also allows you avoid running your battery down to a low state of charge, which is hard on battery life.
The battery monitor works by first sensing when the house battery is fully charged. It then starts to monitor and sum up over time all of the current going out to loads in the RV and all of the current coming into the battery. Since it knows the full amp-hour capacity of the battery and it knows how much current has come and gone from your battery since full charge, it can calculate at any time how much of the total capacity remains.
The first trip after installing the battery monitor, we kept track of state of charge each day (as well as water and propane used). I have to say that while the battery monitor is by no means a must have, it does provide information that is useful and nice to know.
Installation
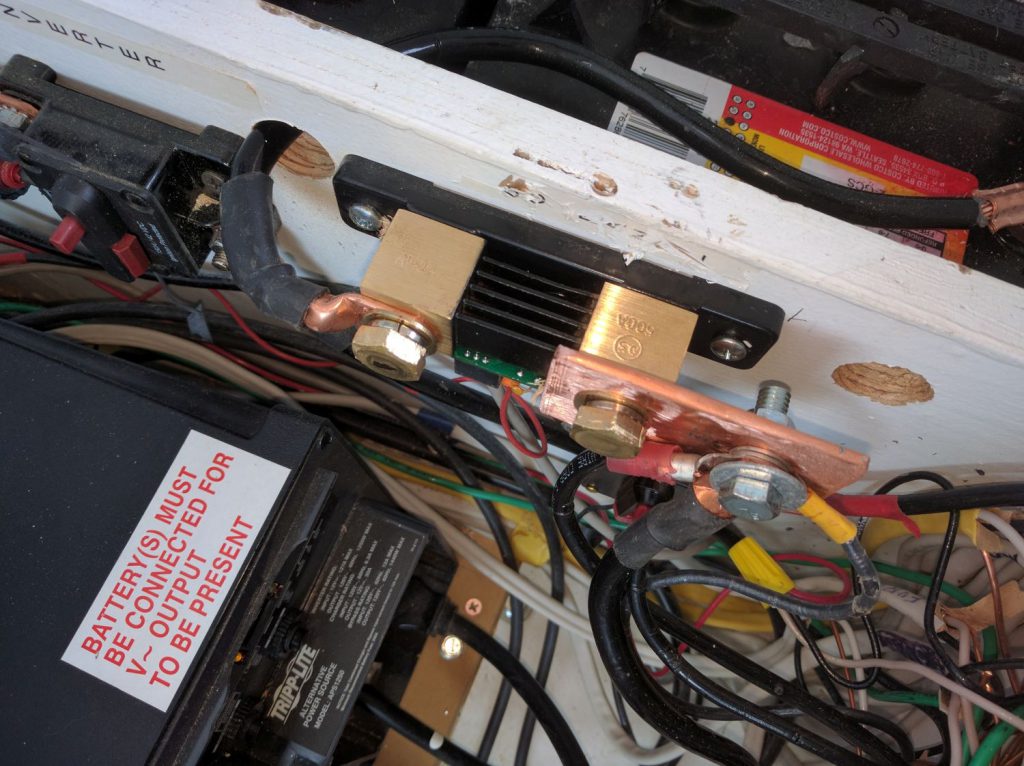
The installation requires adding a shunt into the negative lead of the house battery. The shunt must carry all of the current in and out of the negative terminal of the battery so that it can accurately sum up discharge currents and charging currents into the battery from chargers or the van alternator or solar — so, all of the wires that now go to the negative terminal of the house battery should go to one end of the shunt, and a single wire should go from the shunt to the battery negative terminal.
A small cat 5 sort of cable then goes from the shunt to the Victron meter. This just plugs in. There is also a small wire that goes to the plus terminal of the battery to the shunt that supplies power to the meter.
I would like to have put the shunt right next to the battery, but there was not room for it there, and I had to install it just outside the battery box. This is something to think about if you want to be able to install a battery monitor at a later date.

It would have been nice to just move all of the wires on the negative terminal of the battery onto the shunt terminal, but Victron uses a larger bolt for the shunt terminals, so had I put in copper bar with all the wires coming into one end of it, and the other end attached to the shunt. The copper is a flattened piece of 3/4 inch copper pipe. I’m not all that happy with this, and will probably replace the terminals on the wires with ones that are compatible with the larger bolt on the Victron shunt.
Setup
The setup of the battery monitor is very simple. You use the buttons to set the total amp-hour capacity of your house battery. There are some additional tweaks you can make, but just setting the capacity will work for most people.
One thing to keep in mind about the battery monitor is that you tell it the full capacity of the battery, and if the battery has less actual capacity than what you input, the battery monitor will report higher than actual state of charge numbers. This might become important as your battery pack ages and losses some of its capacity.
The battery monitor will sense when the battery is fully charged automatically and from there it will proceed to track how much current is going into and out of the battery and will be able to report how much capacity remains (as well as amp-hours used).

Gary,
I just installed this battery monitor and so far it’s worked well. It’s $43 and includes the battery shunt. With all the connections, I used two busbars right outside the battery box, inside the garage area.
https://www.amazon.com/gp/product/B07FGFFHC6/
Hi Dennis,
Wow — that looks like a dandy.
Wish I had seen that before $200+ for my Victron.
Just to confirm…
It measures current into and out of the battery so it knows how many amp-hrs are left in the battery? (ie its not just a one way meter).
Has some way to tell it what the capacity of your battery is when you set it up?
Gary
I think it does everything the Victron does except Bluetooth. Here is a YouTube about it: https://youtu.be/E6O76Okmt08
Hi Gary,
Once again, thank you for all your work. 2 questions. I have a bit more room in the battery compartment; my base cabinet is wider. Would you recommend putting the shunt in the battery compartment for the battery monitor? Secondly, there are 2 holes in the cabinet coming from the electrical mechanical area to the battery box. Dosen’t this make the venting for the hydrogen obsolete? Do you still like the Victron 700 or does the Trimetric come with a shunt that is easier to install? thanks, John
Hi John,
If you have room in the battery compartment for the shunt, I’d put it there. Some would argue that the shunt would be better off outside the battery compartment due to the possibility of corrosion from battery gases, but after close to 4 years, I’ve not seen any sign of corrosion inside my battery compartment.
I do like the Victron. Nice and compact, and it seems to work well. My one small gripe with it is that it has those larger terminal bolts which means different size terminal lugs that the ones I had connected to the battery terminal. I don’t have any experience with the Trimetric unit, so can’t really say on it.
I guess you could use a some silicone caulk to seal the holes in the battery compartment so that the H vent works as intended. I think I did that on mine – can’t recall for sure, but if I did not, I should 🙂
Gary