Most people will want to add some windows as a part of the camper van conversion to provide ventilation, views, and light in the van. This page goes over some of the options.
The things you will likely be looking for in van windows
- Durable and well made.
- Provide for ventilation.
- Have screened openings.
- Don’t leak!
In addition, for some, the windows are a strong style statement.
Frameless Windows
Some of the original equipment van windows do not have a visible metal frame — basically all you see from the outside is glass that is carefully styled to blend well with the lines of the van. A nice look. Aftermarket windows with this kind of a look are available for the popular vans (Sprinter, Transit, ProMaster, …), but at a premium price.
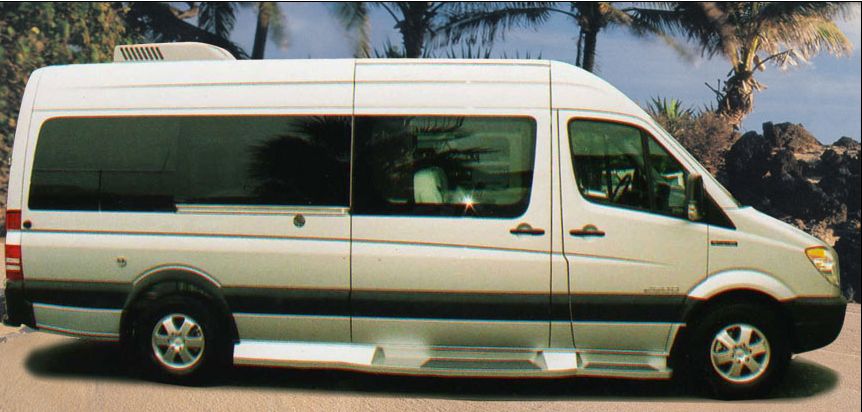
CR Laurence is one supplier of such windows — these windows tend to be up in the $500 per window area.
Using Flat Trailer or RV Windows
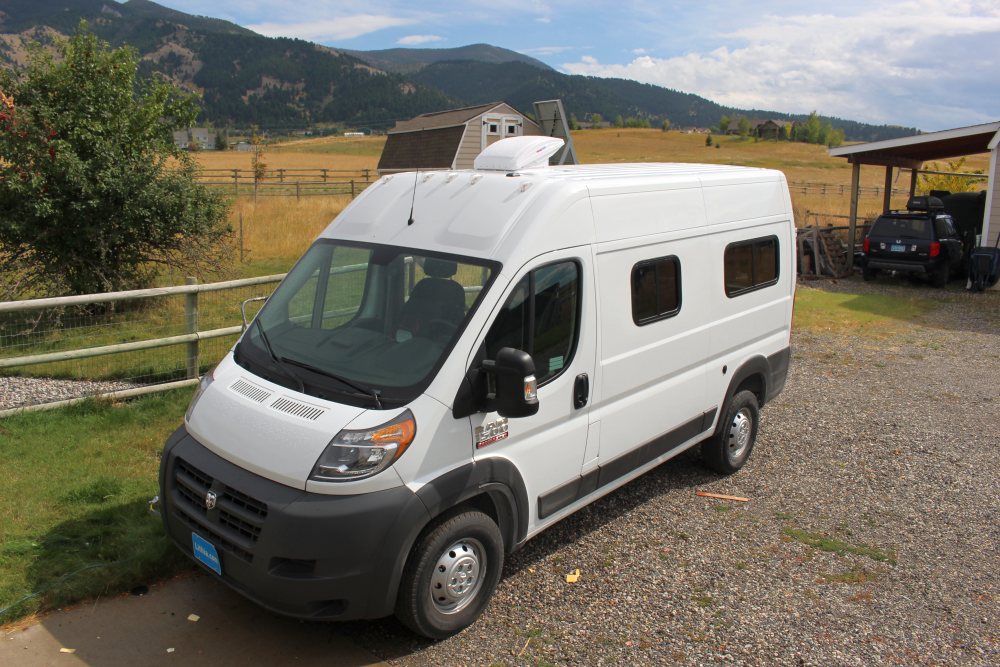
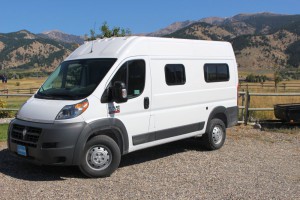
On our van (a RAM ProMaster) the curvature of the van side panel is so slight that you can use windows that are not curved to match the van skin. The advantage of using a flat window is that there is a wide selection available, including ebay bargains. I do not know how the curvature of the other vans compares to the ProMaster and whether flat windows can be used on other brands.
The windows we picked for our conversion are metal framed flat windows from CR Lawrence. We used three altogether: one of them forward over the galley area, and one on each side in the back sidewalls over the bed area. This turns out to be enough window area to give the van a nice light and open feel inside. I would call this a medium price approach — they are nice looking and decently made windows at about $170 per window. There are much less expensive bargains on ebay, but in a couple weeks of looking I was not able to find a set that were the right size and met our ventilation etc. requirements — but, certainly worth a look.
The ebay windows can be an interesting option. Often the ebay windows are high quality from good manufacturers, but they tend to be odds and ends with limited size and selection. As always with ebay, be careful.
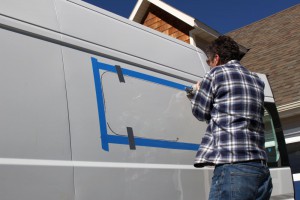
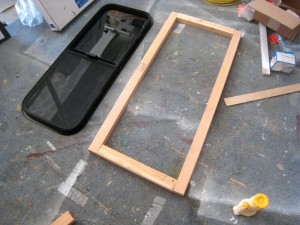
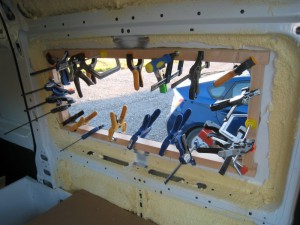
While putting in your own windows is a job that takes some care and planning, it is within the capabilities of a lot of DIYers.
LOTS more detail on how we did the window install on our conversion here…
Motion Windows
Motion Windows make high quality windows for a variety of purposes, including custom windows for Sprinter and ProMaster vans. The windows are custom made to your measurements. Several different quality/feature levels are offered.
They also offer dual pane windows for less heat loss.
CR Laurence Windows
CR Laurence makes a variety of windows. Some are custom fits for specific vans like Sprinters or ProMasters, while others (like the ones we used) are flat windows intended for RV or trailer use.
Seitz Windows
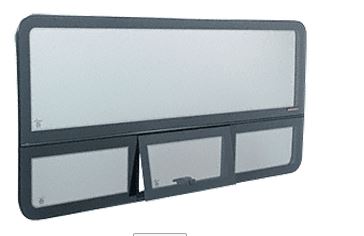
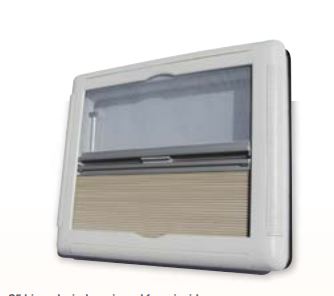
Seitz is a popular European brand with some unique features. They are awning type windows in which the whole window hinges at the top and the bottom pushes out — this makes for more vent area and some rain protection. They are double glazed and come with built in screens and shades. The glazing is plastic, so scratches can be a problem.
This is an excellent rundown on the pros, cons and features on the Expedition Portal Forum…
The windows may be hard to find in the US, and may have to be ordered from Europe. Some US distributors that have been listed in the past no longer appear to handle these windows. Found a few listed on ebay. Some Seitz windows listed in Dometic catalog…, but I don’t believe that Dometic sells them in the US.
Paul N. found a domestic source for Seitz like windows. See his comment below in the comments are for more detail.
Tern Awning Windows
These windows from Tern Overland are a new choice that looks promising.
These are awning style windows that open outward (hinged at the top).
They are Acrylic windows, so scratching over time may be an issue.
They are double wall and are R value of 2.5 — about twice as good as single glazed windows.
They come with what looks like a very nice shade that pulls up from the bottom and insect screen that pulls down from the top. From the videos, these look like they work well and look nice.
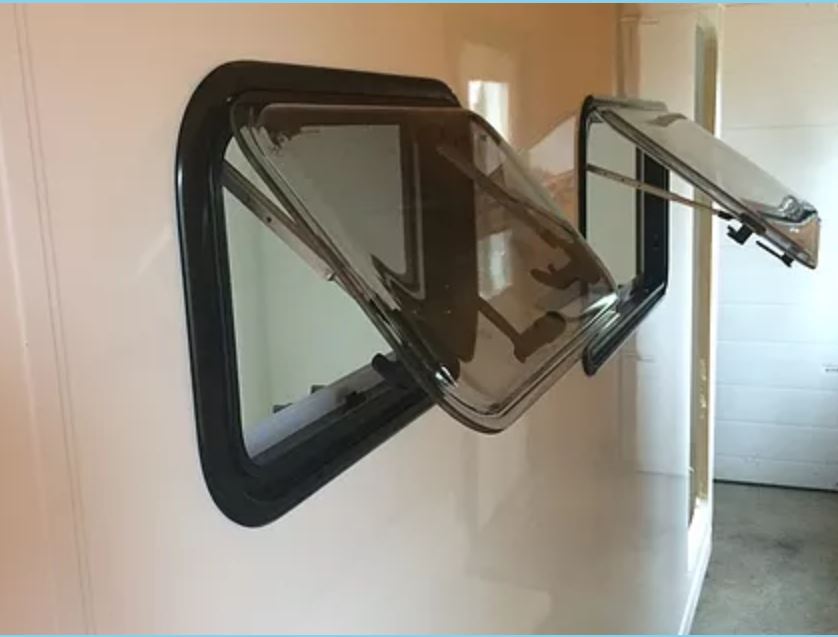
An example install on the ProMaster Forum…
Prices do not seem out of line.
Windows Suppliers
Some suppliers of windows:
Motion Windows — good reputation for custom made windows.
DK Hardware — variety of windows for vans and RVs
ebay — A variety of windows available — sometimes very good deals.
CR Laurence — Maker of custom windows for van conversions
Also, check the online forum for your van for descriptions of installing windows.
Comments, Questions, Suggestions…

I do not understand why I would remove the window itself when replacing the window seal, don’t I need the window in place to put the seal up against?
Hi,
Which window are you talking about?
Gary
Hi Gary: Thanks a great article.
Fir a 2020 118 Regular Roof ProMaster without sidewall insulation, would we order the 2-1/4 or the 1-1/2 ring size from DK Hardware? (I realize that the width and length of my two examples are different.)
CRL VW8209 Universal Non-Contoured Horizontal Sliding Window 21-1/4″ x 16-3/4″ with 2-1/4″ Trim Ring
CRL VW8366 Universal Non-Contoured Horizontal Sliding Window 37-1/4″ x 16-3/4″ with 1-1/2″ Trim Ring
Thanks,
Rick
South Haven Michigan USA
Hi Rick,
This page gives quite a bit more detail on the window install: https://www.buildagreenrv.com/our-conversion/promaster-diy-camper-van-conversion-adding-windows/
From that page: “The clamp ring that comes with the window pulls the window frame tightly against the van wall and holds it in place. The clamp rings are made for a specific wall thickness — in the case of our windows, they offer clamp rings for 2 1/4 inch walls and 1 1/2 inch walls. Our finished wall will be quite close to 2 1/4 thick, so use selected that clamp ring.”
But, I’m not sure if that changes for the 118 and the regular roof.
If you have the van already, I think you could take a look at the pictures at the link above, and do the same measurments on yours to figure out what the best clamp ring would be for yours.
Gary
Thank you for useful information! But I want to know how to install frameless RV window. Can you give me some information. Thanks again!
Hi,
I don’t have any experience with the frameless windows.
You might try searching the ProMaster or Transit online forums — I think I have seen detailed descriptions on the forums.
Gary
Yeah, thank you Gary but I found some useful information that I need in here: https://www.listatrailer.com/how-to-install-frameless-rv-window/ That great!
Nice — thanks!
Often with the ProMaster, people have in mind the factory look windows when they say frameless. They have an all glass look. The install procedure is probably the same as shown at your link, but not sure.
A couple links on the PM forum site for the factory look windows:
https://www.promasterforum.com/threads/cr-laurence-window-install.35137/#post-99809
and
https://www.promasterforum.com/threads/another-i-installed-crl-windows-thread.40505/#post-182617
I’d like to hear how your install comes out — maybe take some pictures?
Gary
Any advice on having the van insulated with foam board then installing a window later. Should the insulation be stripped bare or etc. Thank you.
Hi Ryan,
I insulated first with spray foam and put the windows in later. I kept the spray insulation thin or zero where I knew there were going to be windows. I think you could do the same with foam board — that is, just leave the foam board out where you know windows are going to be.
I think you will have to strip any insulation around the window area before doing the window installs.
Its a bit of a pain to remove insulation that has been glued in place with Great Stuff foam, so I’d say try to minimize the area you will have to remove insulation. If you leave open places in the foam board where the windows are going to go and make them a bit larger than the windows, then you can come back after the windows are in and fill the gaps with Great Stuff.
https://www.buildagreenrv.com/our-conversion/our-conversion-insulation/
Gary
If you’re going to use single-component (‘Great Stuff’ type) spray foam to fill gaps and adhere polyiso foam board directly to the inside of the vehicle’s exterior sheet metal, I’d strongly suggest using foam that remains somewhat flexible (e.g.: Window & Door version) rather than the regular ‘Great Stuff’ (red can). Loctite TiteFoam is better than ‘Great Stuff’ (but not much yield per can). DAP Draftstop 812 is the best commonly available option for this.
I have a 2017 GMC cargo van and want to put windows on both sides at the rear, can I use flat windows on a some what curved van. I want a horizontal sliding window, looking at CRL VW 8249.
Thanks in-advance. Jay
Hi Jay,
I’m not sure — it depends on how much curvature the van side has.
Flat windows were fine on my ProMaster, but it does not have much curvature. See the pic on this page with the straight edge against the side of the van where the window will go: https://www.buildagreenrv.com/our-conversion/promaster-diy-camper-van-conversion-adding-windows/
If your van does not have any more curvature than this, you will be fine, but I don’t think that much more curvature than this would work.
Maybe google around a bit and see if you can find anyone who has tried a flat window on the GMC?
Just a quick look at some pictures of the GMC from the rear makes think it has more curvature than the ProMaster, but its hard to tell from a picture.
Gary
Gary,
thanks for getting back to me and you had some good advice, I went and checked my curvature and it’s a lot more than I thought. I was wanting the same window that you have on your Pro Master but I will keeping checking around in hopes of finding a window that will work. I have the same Maxxfan that you have and it helps a lot. Jay
This is a very helpful blog. Thank you so much for the information. I recently purchased the CR Laurence universal windows to install on the driver’s side.
Is there a right or wrong way the slider should be positioned? (ie. Should the sliding window be towards the front or the back of the van?)
Thanks so much.
Hi Keith,
I installed all of mine (drivers and passenger side) so that the slider and screen are the aft half of the window.
The thinking was that when you look at the window from the outside, it looks less likely that rain would get blown into that middle vertical joint of the window when they are mounted with slider aft.
The windows are made with weep holes at the “top” and “bottom”, so the same window can be installed with slider aft on either side of the van by rotating it 180 degrees and still have a set of weep (drain) holes on the bottom.
Very odd that CRL includes no instructions at all with the windows.
Gary
I forgot to ask. I noticed the Pro Master doesn’t seem to sit “level”, with the rear a bit higher than the front. Is the floor inside flat or follow the same slant the body has outside? Will it level out with the weight of an interior? Or will I have to compensate for the slant when I install the floor cabinetes? Thanks
Hi Charlie,
The van floor does slope down to the front. Most conversions don’t add enough weight in the back to level it out.
Some people take steps to level it out (eg removing the “helper” spring in the back. There is quite a bit of discussion of this on the ProMaster Forum.
For us, its pretty much a non-issue. We try to park the RV at the camp spot such that the rear is higher so that we sleep with our heads toward the up end — if that’s not possible, we flip the bedding around so the head end is up. We never take any steps to level the van (eg with blocks or wedges under the tires) — we don’t even carry anything to do leveling — just not really an issue. The exception might be if you plan to use a propane fridge, which requires that the RV be level to work — but, for lots of reasons, you probably don’t want to use a propane fridge.
Gary
Are windows necessary? I am planning not to have a window, not even the two big ones on the back panel doors. I think the van would blend in better and trap heat better (of course heats up faster in hotter days). I do not plan to stay in the van during the day except driving therefore I don’t need windows. Are they valid points?
Hi Jen,
For us, the windows are mostly for aesthetic reasons — we like the views and the light and open feel that the windows give the van when you are inside it. Some people like the cozy feeling that no windows give.
From a practical point of view, you will have to think about how you are going to get some ventilation going in the van. Ventilation really helps for summer weather when the van will get pretty hot without some moving air. Most people use a power fan on the roof (like a Maxxfan) combined with open windows to get the flow through ventilation.
You might be able to use a Maxxfan on the roof in front combined with a 2nd roof vent near the back of the roof, or a floor vent.
Gary
Another practical point is the window on the sliding side door. When making left turns, it is often easier to catch last minute traffic by looking out a window in the sliding door. If you pull up too close or once you start you turn, it is often difficult/impossible to see traffic coming from the left.
For sure – we ended up adding a window on the slider for safety. With certain types of intersections you just can’t see the traffic without it.
Gary
We did our windows this way and it worked so good! It was scary at the beginning but we are so happy we did it! http://van-derlust.com/installing-the-windows/
I wrote up a post on a Balboa used as a food cart in Eugene: http://www.curbsideclassic.com/blog/cc-capsule-1973-balboa-dodge-motorhome-porkys-piglet/
I’m convinced that Chinook basically copied Balboa as there were already balboas on the older Dodge van chassis, going back to 1968.
I’m sentimentally attached to the Chinook, but it is now old, inefficient, and has no cab a/c, as well as other shortcomings. But I love its cozy cabin with its huge windows. I know I’m going to miss aspects of it.
I will undoubtedly do new posts on the PM as they happen, and then maybe combine them. But not in great detail; I’ll leave theta to you. 🙂
I’ve given the fridge thing more thought, and swung back to electric units. I found a particularity interesting thread at a sportsmobile forum about a guy (LenS) who superinsulated a $99 Energy Star dorm fridge and made it substantially more efficient than the best RV dc units. He runs it off a very efficient inverter: http://www.sportsmobileforum.com/forums/f34/modified-energy-star-3-2-cu-refrigerator-15187.html
I did the exact same thing to a 1940s Crosley upright freezer 20 years ago, and I put a Killawatt on it and it uses less juice than a new freezer chest. Well, I used like 1.5 or 2″ iso boards, but it’s a big unit.
I may give that some serious thought.
One more thing: I ordered the Seitz-type windows today from a brand new US distributor: https://www.ternoverland.com/eurovision-windows They’re the Chinese built ones that are used commonly in Australian RVs. I caught them just as they were putting in an order from China; will be here in mid July. Shipping from AZ is quite reasonable. Having read all the issues about folks buying these form the UK and Germany, with huge shipping bills and 4 months wait, you might want to update your Seitz window paragraph with this info.
So now I have 2 months to plan more, and maybe do the floor, or? I’m quite busy in the summer with some rental properties, but I need to get it done for a 2 month trip to the SW by Xmas; hopefully sooner. We can still use the Chinook for nearby summer trips.
Hi Paul,
Well, that may be the most unique fate for a Balboa 🙂
Interesting post on the dorm fridges. I’m a little skeptical that adding R3 insulation over part of the fridge exterior could reduce heat loss use by a factor of 2.5, but even if the test is optimistic its still impressive.
My test of energy use on my RV fridge coincidentally worked out to 219 KWH a year, and I remember thinking that after all I had heard about the efficiency of the Danfoss compressor it was surprising it did not do better compared to some of the Energy Star fridges given that its much smaller. So, the insulated dorm fridge coupled with an efficient inverter with low idle time power use may be a good way to go. I wish I had room to try some additional insulation on mine.
The Energy Star site offers a downloadable list of all fridges with the KWH per year ratings — might be helpful in finding a good one.
https://www.buildagreenrv.com/design-and-build-information-for-camper-vans/installing-galley/measuring-refrigerator-electricity-use/
I’ll add the source for the Euro windows.
Thanks again for the feedback. yes, I may have to just trim the windows more like house windows, as the max wall thickness on these Seitz-type EuroVison windows is 54mm (2 1/8″). That would be ok too.
We’ve had a ’77 Dodge Chinook for 15 years, that we’re replacing with this new PM. it has the original Dometic fridge, so that’s the only experience we’ve had. I just turn it on 12-24 hours before we roll. It always works even after 40 years, but yes, in hot weather, it can take a while. They’re so simple, it’s hard to imagine anything breaking, although the new ones probably have electronics in the controls.
I would have to listen to a Norcold (or similar) before buying one. It appears that’s about the biggest size for the hi-efficiency units. Which is another issue, since we do like to take a fair bit of fresh/cold food on longer trips.
But yes, the two big vents are a downside. Getting propane on trips has never been an issue for us, with a reasonable-sized tank. We have no furnace in the Chinook, so it’s been just the fridge and cook top. It also means we could easily get by with just one 12V RV battery, FWIW. Trade-off, either way. I will have to research this a bit more.
I wrote up my basic plans (and floorplan), and linked to your site (and used a couple of your pictures) at my fairly popular automotive website: http://www.curbsideclassic.com/auto-biography/my-new-future-campsite-classic-2017-ram-promaster-2500-im-going-to-build-my-own-new-chinook-camper/
The more I think about, the more I’m happy I decided to go with the rear-door configuration, which we love in the Chinook, and is just more space-efficient. And your comment about the back door being easier and quieter to open and close is spot-on. I’m already using it almost exclusively.
Hey Paul,
We were big fans of the Chinook back when we got our first RV in the 70’s. We were in the process of looking for a Chinook we could afford and ran across a Balboa from Jensen Marine — it had the same general layout and wide open feel inside and the price was right. Had some great times and trips in it, and really liked traveling in it. Not many ever sold, but it has developed a bit of a cult following.
That’s a really good writeup you did with some great points — and thanks for the plugs 🙂
I like your internal layout. I don’t know why we all seem to get hung up on using the sliding door as the main entry to the back — I think what your plan to use the rear door as the main entrance is going to work well. I like the way you offset things a bit to the right just forward of the back door so you only have to open the right side to get in/out. You have probably already thought about a step to get in as the floor is kind of high for one step up.
Please keep us posted on the build. Do you plan to add build info to your page on the PM?
Thanks,
Gary
Thanks, Gary.
I just bought a 159″ HiRoof 2500, and your build and website are a huge part of giving me the confidence to do this myself, and do it right.
I’m a bit perplexed about wall thickness, as it applies to the windows (the rep wants to know what the wall thickness is). When I measure various point where you appear to have attached your wall paneling to the framework, I get anywhere from about 2″ to 3″, right at the shoulder of the main vertical rib in the middle of the van. Is that consistent with your experience?
I’m planning on insulating with poly and foam, as I’ve done that quite a bit in old-house renovations. I see you added quite a bit of foam from a can after your initial spray foam job. if you were doing rigid, would you do mire than 1″, or you think that’s overkill. Probably so, as we don’t anticipate serious cold weather camping.
I’m planning to use 1/4″ pine T&G paneling, as we want a more natural wood look, and one advantage I think will be the lack of a template and cutting out the whole sheet, as I can just trim the individual pieces as per the framing. I’ll have to attach wood stringers to the steel to then nail the paneling to.
I was leaning to a DC fridge like yours, but two things are pushing us to a larger Dometic propane unit: more space, and no noise at night. We’re older and lighter sleepers, and don’t want to hear a fridge kick in at night. I’ll plan to attach a larger propane tank underneath.
I’ve learned so much from your conversion. I’ve come up with a somewhat different floor plan, with two twin beds in the front, we’ll use the right rear door for main entry into the unit), and a Nature’s Head pottie in the far rear. That will allow for a good-sized full-height cabinet across from the rear galley for the fridge and other storage.
Thanks for all your prompt responses. I’m glad to have found this site and now a source for the Seitz-type windows, as I plan to install them before I do the insulation.
Hi Paul,
Congratulations on the van!
For our windows, I have that wood frame around the window opening on the inside that is glued to the van sheet metal. I believe that on mine this spacer frame is just a bit over 2 inches, and provides a constant wall thickness in the window area for the window to mount to. As you say, the thickness of the van frames vary, but our wall paneling is flexible enough to accomodate the variation. The clamp ring that we ordered with our windows are for a 2 1/4 inch walls.
If your paneling is too stiff to accomdate the difference in thickness between the window spacer frame and the surrounding metal frames, you might make the wood spacer frame wider and then use the outer part of the spacer to mount a wood frame to that has enough depth to accomodate paneling coming into the spacer at different levels?
I think that 1 inch of poliso is a pretty good level. If you combine the inch of polyiso with some form of insulating shades for the windows (like Reflectix), it will cut the heat loss by about 80%. You would have to go up to 2 inches of insulation to cut the heat loss by 90%. We found that with night temps of about 20F, our furnace runs about half the time.
Unless you already have experience with the propane fridges, I’d give the fridge decision a lot of thought — maybe talk to some people who have had a propane fridge. The things I don’t like about them: van has to be level to use them; they are so slow to cool down, that it takes a LONG time to even know if they are working; two big holes in the side of the van for venting; inefficient – they are significant consumers of propane. I’d honestly rather go to an ice box rather than go back to a propane fridge.
I wonder if you could find a quieter electric one? Maybe check out the brand that uses the “swing compressor”? Or, add some sound absorbing material around the fridge (but it would have to allow ventilation)?
RD on the ProMaster forum has done some experimenting with the fan on the Norcold 751 that he and I use to reduce noise (the fan makes most of the noise) — should be able to find it with search on the forum, or drop him a message.
On the space front, you should be able to find a larger electric one than the one we used — probably with a little higher power use.
I may feel more strongly about this than some, as there are some happy owners, but I’d give it a lot of thought.
The T&G sounds nice. I’d like to hear how that comes out — our plain white ceiling is looking kind of plain to us, and I’ve been thinking about a wood ceiling.
One nice thing about your floor plan that uses the back door as the main entry is that its easier and quieter to open and close the rear door than the sliding door.
I think you will like the Natures Head toilet — I’ve heard nothing but good things about it.
Please keep us posted on how the conversion goes.
Gary
Hi Paul: Thanks a great article.
For a 2020 118 Regular Roof ProMaster without sidewall insulation, would we order the 2-1/4 or the 1-1/2 ring size from DK Hardware? (I realize that the width and length of my two examples are different.)
CRL VW8209 Universal Non-Contoured Horizontal Sliding Window 21-1/4″ x 16-3/4″ with 2-1/4″ Trim Ring
CRL VW8366 Universal Non-Contoured Horizontal Sliding Window 37-1/4″ x 16-3/4″ with 1-1/2″ Trim Ring
Thanks,
Rick
South Haven Michigan USA
I’ve found what appears to be a new US based distributor for Chinese versions of the Seitz windows: https://www.ternoverland.com/eurovision-windows
I thought I had remembered you saying here that you thought the Seitz windows were flexible enough to work on the PM’s curved sides, but I can’t find it here. Do you know of anyone who’s actually used them on a PM? I really want to use them, but am a bit concerned if the curvature will work ok with them.
Hi Paul,
I don’t have any direct experience with the Seitz windows, but have heard good things about them.
SteveSS on the ProMaster forum has the Seitz windows — here is one of his comments on them: http://www.promasterforum.com/forum/showthread.php?t=44521&page=3
I don’t think the curvature of the PM side panels is enough to be a problem, as my windows are flat (no curvature) and they work fine.
The only negative thing I’ve heard on the Seitz windows is that they scratch, but I think that it is possible to fix the scratches.
Gary
Good write-up on window installation! I have it linked in my planning notes for our van Conversion.
My question- now that time and miles have passed, are you still satisfied that non-contoured windows are a good idea? Have you seen the walls of the van show any rippling around the window? Is the frame pulling away or leaking?
I ask because Motion Windows seems very opposed to flat Windows in the Pro Master, but we want the 50/50 slider and only need the 16-3/4″ window height.
Thank you.
Hi Paul,
No real problems, although some have had trouble with leaks on the CRL windows (but not me). The leaks appear to be a feature of the windows themselves and not related to being installed on a slight curve.
I think that if you look hard its possible to see a little more warping of the sheet metal that when the windows first went in, but may be my imagination. I don’t find it objectionable at all.
Certainly nothing like frames pulling away or any kind of leaking due to the slight surface curve.
On the other hand, I’ve heard only good things about the Motion Windows.
Gary
Do you know if the flat windows are ok for sprinter vans?
Hi,
I don’t, but I think that the upper side panels on the Sprinter have more curvature which would make it harder.
You might try the Sprinter Forum to see if anyone there has tried flat windows.
Gary
It looks like whatever $ saved on window choice was spent on clamps ;-D
That’s what $200 worth of clamps?
You can NEVER EVER have too many clamps 🙂
I tend to buy them on sale or at junk sales — its a 30 year collection — I like the Irwin Quick Grips the best.
Gary
Question about your window behind driver seat and over kitchen counter.
You mentioned you had purchased these at CR Laurence, but when I clicked on your site it came up as DK Hardware. Looked like the CRL Universal non-contoured horizontal sliding window …21.25×16.75 “, #VW8209.
Is ths correct? Looks like it would be a perfect pick for our needs in the small galley. Thanks for your feedback.
Hi David,
DKH is one of the main sellers of the CRLaurence windows.
That sounds right — I will try to remember to measure the window tomorrow or get a number off it.
The “universal non-contoured horizontal sliding window” sounds right — that is, the windows I got are flat (non curved) and they are sliders.
Gary
Great info, thanks for the details!
Thanks Jeff!
Gary