What’s Good in a Floor?
You will likely want to put some sort of floor in your conversion van.
The generally desirable characteristics for a floor:
- Strong and durable — able to handle the foot traffic and loads.
- Light weight
- Insulated to reduce undesired heat loss/gain
- Replaceable wear layer
- Looks nice
- Does not squeak or make noises when walked on or when driving
- Easy to install
- Low cost
If you are going to carry heavy toys (eg motorcycles), then the “strong and durable” gets more important.
Floor Options
Commercial Floors and Floor Kits
If you are converting one of the common vans, there are some commercially available floor kits that come with precut floor pieces to fit your van.
Some examples:
I was not able to find much in the way of floor kits, and the ones I did find tend to be oriented to hauling heavy commercial loads and expensive. If you know of better choices, please let me know..
2024 upate
A lot of van conversion floor ideas have been tried in the 10 years since this page was first done. The one that has emerged as the easiest and least labor intensive is to a layer of rigid insulation on the floor sheet metal covered with plywood.
The best insulation for floors is extruded polystyrene (XPS). XPS provides very good water resistance (for leaks and spills that can ruin a floor) and provides a good R 5 per inch of insulating value. And, its low maximum service temperature is not a factor for floor insulation.
Opinions differ on the thickness of p
Plywood over Rigid Insulation Board
This is the approach we used on our conversion.
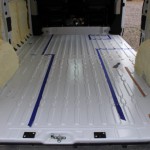
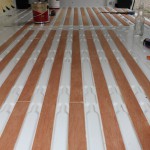
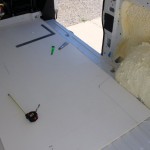
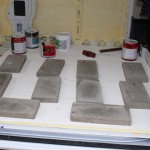
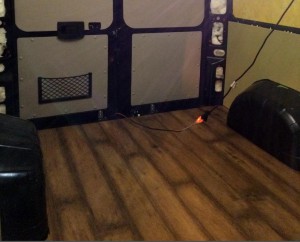
It uses 1/4 inch plywood to fill the spaces between the metal floor ribs, followed by a one inch sheet of rigid polyisocyanurate insulation board, followed by a layer of 1/4 inch plywood, and topped off with a floating vinyl flooring.
The layers are glued together using Great Stuff polyurethane insulation, which is a good adhesive.
Some overview pictures…
There is a full detailed description of building this floor here…
On the plus side, this approach is light weight, relatively easy to build, and not expensive.
We were a bit concerned about how durable the 1/4 inch plywood over insulation board would be, but it has (so far) worked fine. It has also been quiet. I would not change anything if I were doing it again.
While we used sheet Vinyl for the top layer, you could use tiles or wood or carpet depending on your tastes or what kind of service the van is in.
If you are thinking that maybe I don’t need insulation under the floor…
Plywood Floor Without Insulation
Some people just glue and screw a plywood floor to the van metal floor.
This is durable and simple, but it does leave you with very little thermal insulation for 20% or so of the van surface area.
Here is one example from the ProMaster Forum:
Of course, you want to be careful when screwing the floor down to not hit anything underneath. You could stick to glue alone and probably do fine.
Plywood Floor on Spaced Up On Deep Ribs
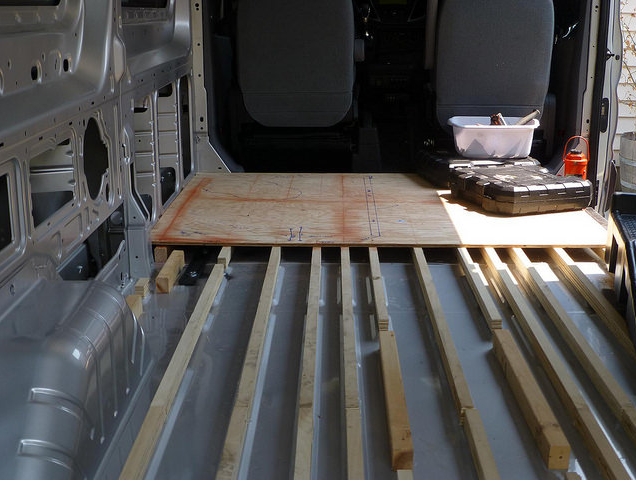
This is an interesting floor design from the Ford Transit Forum that uses a plywood floor spaced up a couple inches from the metal floor using wood ribs glued to the floor metal ribs. Rigid sheet insulation is added between the wood ribs.
This approach should be durable and allows using thick insulation.
Raised Floors
Some conversions use a floor that is raised a few inches to allow long items to be stored between the van metal floor and the raised floor. You can store items up to 10 ft long in the 136 wheelbase vans under such a floor.
2024 Update
After building my own floor and watching 10 years of floor build description on the Pro Master Forum and YouTube, this is what I would do if I was building out a new van today.
From top to bottom…
- A finish layer of whatever you like (Vinyl tile, Vinyl sheet, Marmoleum (popular lately), carpet, or just paint)
- A layer of half inch plywood. I would use Medium Density Overlay (MDO) plywood – this is a high quality plywood with resin impregnated face sheets. It is very stable and very waterproof. Waterproof can be important in that the floor can be subjected to spills and slow plumbing leaks that can go undetected and completely ruin the floor – this is horrible to repair.
- A layer of 1 inch XPS rigid insulation. XPS (Extruded Polystyrene) is a good choice because it is very waterproof and has good bearing strength (for walking on), and it has a good R value. I would not use XPS for wall or ceiling insulation because of its low maximum service temperature, but this is not a factor for floors.
- No framing. There is no need for any kind of framing under the floor – XPS insulation (or Polyiso) have plenty of bearing strength to support walking traffic without framing. Using framing takes a lot of time, costs money, reduces floor insulation effectiveness and serves no purpose.
- No fillers in the floor corrugations. Dozens of floors described on the ProMaster Forum have proven that the corrugations do not have to be filled. If you ever do get a plumbing leak the open corrugations allow water flow out at the back and alert you to the fact you have a leak – hopefully before it destroys your floor.
Opinions vary on how to fasten the floor down. I would use adhesive to bond all the layers together. To fasten furniture to the floor, I would bolt through the floor sheet metal and use large washers to prevent pull through – I believe that this is best for keeping things in place in crashes. It also avoids any chance of squeaks developing. See the links below for other methods.
For more information, the ProMaster Forum is a good source. One thing to search for is “Van Conversion Myths”.
Camper Van Builds with Floor Details
A few links to camper van conversions that have at least some detail on the floor approach they used.
Class B Forum, good floor template techniques…
ProMaster Forum, Surfer van…
ProMaster Forum, Camper van…

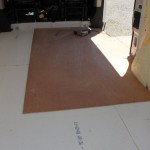
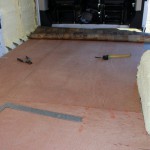
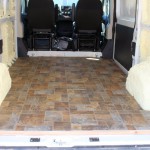
Hello Gary and all of your knowledgeable contibutors,
I am brand new to this very helpful site having just purchased Promaster 2500 159″ standard. Starting on floor today. Can anyone comment on my floor insul plan to uses 1/4 inch polyiso between the metal floor ribs (floating-no adhesive), followed by a 1/2 inch sheet of rigid polyisocyanurate insulation board(floating-no adhesive) , followed by a layer of 1/4 inch plywood(screwed and held by factory tie down washers/ bolts, and then a floating vinyl floor or laminate? Am I setting myself up for squeaking and shifting or does it stand a chance of succeeding??
Hi,
I’m not sure.
I made a point of bonding all the layers on mine together to make it act as a single unit, but never tested an unbonded version.
I guess if it does squeak, it will be easy to take apart and add glue.
Without the plywood layer being bonded to the insulation layer, I’d consider going to half inch plywood.
Please keep us up on how this works out.
Gary
I recommend at least 1/2 inch plywood over the polyiso.
Lots of things will eventually be screwed into that plywood. In my case I did screw the beds, galley, etc into the plywood through the vinyl flooring. It has worked well over the past two years. I did not through the metal floor.
Good luck on your work.
Hi Davi
I think half inch plywood is fine, but I recommend bolting all heavy items (beds, galley, batteries, …) through the floor and to the sidewall frames. Use large washers under the floor metal where the bolts come through to prevent tearout. This is to keep things in place during a crash — in a 32g crash, the 200 lb bed platform/storage becomes 6400 lbs of trying to rip it out of the floor to join you in the cab.
Gary
Hi Gary,
Just wondering, when you bolted your galley and bed frames and battery box through the floor, had you already pre-cut holes for the bolts before putting in flooring, or was it straightforward to make these holes after the flooring was in place? Did you use any of the factory tie-downs? Also, how did you determine how many bolts to place and the size of plate for preventing tearing out?
Thank you,
Laura
Hi Laura,
I drilled the holes after installing the plywood/insulation floor and bed platform, so drilled through all of them at the same time. You just have to be careful that the hole comes out under the van in a good place.
I did not attempt any careful analysis given the complicated geometry. If (for example) a bed platform and the stuff stowed in it weighs (say) 200 lbs, and you use the sort of standard 30g crash, then the total forward load on the bed platform in a crash would be about 6000 lb. A single 3/8 bolt if ideally loaded would take this much load, but the bolts are not ideally loaded, and the plywood bed base would likely break before the bolt would fail. I ended up using about six 3/8 bolts trough the floor for each bed platform and also used a couple of rivnuts or bolts near the top of the bed platform to one (or two) of the vertical van wall frames. Also tried to build the bed platforms and cabinets strong with glued and screwed joints so they have descent chance of staying together in a crash. I feel pretty comfortable with this, and its probably better than 95% of the RVs out on the road these days.
The plates under the floor to prevent pull through are about 1.5 by 2.5 inches and about 3/16 ths thick — I’m about 99% certain that something else will fail before these plates pull through the floor.
This page has a bit more on the bolting down of the bed platforms: https://www.buildagreenrv.com/our-conversion/our-conversion-beds/
Gary
Turns out I have just the right amount (2 2/3 sheets) of salvaged vintage (1960s) 1/4″ fir plywood. So although I was originally planning to go with 1/2″, this stuff is tough (from old growth wood) and very flat, so I’m planning to use it. Still no regrets with your 1/4″ floor?
Hi,
No problems — its been fine.
I think that something heavier would be in order if planning to carry something like motorcycles, but just for people walking on it, the 1/4 inch is doing fine.
Gary
Hi Gary, I love your site! I appreciate all the step by step info; you ought to publish it in book form! I am getting ready to convert my Promaster only I’m not sure the order in which to do everything. Did you do yours in the order listed; flooring, windows, insulation, electrical, etc? If so, would you do it in that same order again, or change it up? I was thinking of doing the electrical first, then windows, insulation, walls, floor. I’ve no experience with any of it and just want to build it out the easiest way possible 😀 Appreciate any advice! Thanks SO much!!
Hi Rita,
Thanks!
As far as I can remember, I did insulation first, then floor (with the pex pipe that runs through the floor from pax side to driver side). Then I think I enough of the driver side bed platform to hold the electrical and batteries, then electrical. I think windows next. I think walls and ceiling next. Then the water tanks. I think the galley and composting toilet were last.
I used the spray urethane insulation, so it was messy and requred a lot of masking — so seems reasonable to do it first. It also requires access to the full walls and ceiling. I let some areas unsprayed where I knew I would be running wires.
I guess the main thing is to think through the whole conversion so that you can make provisions for things you will need to do later in the conversion (like leaving room for plumbing and electrical runs).
Good luck on your conversion — please keep us posted.
Gary
Thanks for your feedback Gary! I hope to get started soon!
Rita
Looks great! We are so happy with our flooring too! It feels so great to have this part done!
http://van-derlust.com/flooring/
This is great info. On insulating – does it make a substantial difference in sound? We had to tear up part of the floor so we have a section behind the cab that is bear to the metal; the rest of the floor is covered in 3/4″ plywood with lino on top. Thinking we should insulate this section while we can, for sound. We’re not too concerned about temperature.
Hi
About all I can say is that insulating my van made a big improvement in noise, but not sure how much due to floor.
I think at some point you will want the insulation for hot or cold.
1/4″ plywood for the floor? No denting at all from the foam underneath? You still feel strongly this is strong enough?
Hi Paul,
No denting that I can detect, but I’ve not removed the floor (which would be very hard to do) to inspect the Polyiso foam.
I never actually felt “strongly” that the 1/4 inch would be OK, but I did think it would be OK and went that way. Given the performance, I feel a little more “strongly” now 🙂
Polyiso has a bearing strength of about 20 psi, so the plywood has to spread the load of a 200 lb person who is putting his weight on one foot over about 10 sq inches to avoid exceeding the 20 psi. It seems likely to me that the 1/4 inch polyiso can do this.
I just went out to the shop and found a scrap of polyiso, and bounced up and down on the polyiso with no plywood. I could feel a very slight deformation, but nothing that stayed after I took my foot off. I weight about 190 lb.
I’d say if you are in doubt about it, use half inch plywood — its not much of a loss in standing height or a large weight increase.
Gary
I am surprised you used vinyl flooring. It is very toxic. Linoleum, on the other hand, is very green. I know people often get the two confused, but they are drastically different in terms of toxicity and in terms of “being green.” I am converting my van and using linoleum for both side walls and flooring. I am currently researching the best option for adhesive that is non-toxic. Love the work you are doing.
Cindy – can you post more info about non-toxic flooring options?
gary-
quick question for you. does it bother you that this polyiso is fairly flammable? i tried lighting some on fire and it went up pretty quickly! makes me hesitant to insulate under the floor with it up by the engine. or am i just being paranoid? tks much – john
Hi John,
You can get a form of the polyiso that is more resistant to flame — it has face sheets on both sides that appear to be some type fiberboard. I just tried a little fire test on it in the shop — if you hold a wood match up to the face sheet, it takes about 8 seconds to burn a small hole through the facesheet and the stuff under catches fire. If you remove the match the fire goes out. Of course the edges (with no facesheet) catch fire more easily — but it still goes out when you remove the flame.
One brand for the polyiso that comes with the facesheets if Atlas RBoard. I used this on my floor because I had some of left over from and earlier project.
I suppose its something to think about, but when you look at RVs (especially commercial ones) they are packed with flammable materials, so I decided not to worry about it for my conversion.
I did try the same sort of sort of test on a sample of Thinsulate and it goes snap crackle and pop with a pretty vigorous flame that does not go out when you take the match away. And, supposedly it meets some kind of flammability standard for use in vehicles.
Not sure that helps much.
I can’t think of any common insulation material you could use on the floor that would be more flame resistant than the polyiso, but there probably is something.
Gary
Couple of further thoughts.
You could run aluminum tape around the edges of the polyiso to make them more resistant.
Wonder about a paint that would impart some fire resistance? Back at Boeing some things were painted with intumescent (sp?) paint, which was resistant to fire, and actually foamed up a bit to insulate the material it was painted on from the flame to some degree.
Gary
Gary-
Thank you for getting back to me so quickly!
Yes I was thinking of adding some aluminum tape as you suggested.
Another question for you. The front part of my van has an irregular floor. As such I can really use sheets of plywood over it as it will be too uneven. Any thoughts for substitutes?
Many thanks – John
Hi,
Not sure exactly what you mean by uneven, but would it work to use something like Great Stuff urethane foam in a can that would accomodate the unevenness of the floor?
Maybe for that area, you could put some Great Stuff in place, and then place the plywood over the foam before it cures?
Gary
Hi Gary,
I’m starting my project this weekend and I like the way you did your floor so I intend to copy. One question, did you use the Great Stuff of the spacers to adhere to the metal? Also, did you rip the slats your self or did you find them commercially?
Hi Chris,
I used a polyurethane adhesive caulk to glue the spacers to the floor. Cannot remember the name, but I think it was made by Loctite and it might have had “3X” in the name.
Its whats in the caulking gun on one of the photos on this page: https://www.buildagreenrv.com/our-conversion/our-conversion-flooring/
But the label does not show very well.
I think that using the Great Stuff might also work fine, but you would have to weight them down to make sure the foam does not push the strips away from the floor as it wants to expand as it cures.
Gary
Gary,
I like your flour design and plan to mimic it in my gmc safari conversion. Curious to know why you placed the plywood ribs down between the raised channels on the floor? Many thanks, Nathan
Hi Nathan,
They are just spacers to bring the level of the low parts up to the level of the raised parts. I was concerned that the polyiso insulation board would get pushed down into the lower parts when we walked on it. Not sure if its really necessary, but most of the conversions fill the low spots in one way or another.
Gary
Enhnglteiing the world, one helpful article at a time.
Has anyone used Lizard Skin noise reduction material? It looks a lot more effective than the mat material?
http://www.lizardskin.com/sound-control-insulation.html
I don’t know about doing noise reduction in my van conversion (Chevy Express 2500 extended), but I’m strongly considering using their ceramic material for heat insulation, even if it is pricey. It’s non-toxic, and looks really effective.
I was really impressed by both of their demo videos.
Hi Steve,
I put up a reply to your similar comment over on the insulation page
https://www.buildagreenrv.com/design-and-build-information-for-camper-vans/install-insulation/
Gary
Thanks Gary for your reply. I will keep you posted on the build and perform the noise measurementsas we go along.
Gary…I left a comment on the old site so this may be a duplicate.
With new 2016 Promaster (136″ HT), I’ll start the floor process next week. Cost was $30,369 in Oregon. I will follow some of your plan…not the spray foam for insulation. Our sounds in the cab when driving are amazingly loud…can’t talk to my wife without yelling. So…thinking of putting down Dynamat to cover the entire floor and some of the interior wall space before doing anything else. Then…insulation with wood slats, polyiso board, plywood and vinyl linoleum, similar to your floor. What do you think of Dynamat Extreme as a noise reducer?
Hi,
I did not put much effort into noise reduction — I placed some noise damping material on the inside rear fender walls, but that was it.
In hindsight, if I were doing it again, I probably would use more noise treatment. The insulation and wall/floor/ceiling panels do attenuate noise quite a bit, but I would like ours to be a little more quiet.
One thing that turned me off a bit on adding more sound damping was that I could not find good data on how effective all of those pretty expensive noise reduction mat products are.
If you do go ahead and add noise treatment, you could get some before and after noise measurements that would help others decide if adding noise reduction material is worth it. I worked out a pretty simple method you could use to get some good noise number: https://www.buildagreenrv.com/our-conversion/our-promaster-camper-van-conversion-measuring-noise-levels/
To make this worthwhile, you do have to measure before and after the noise treatment is installed.
Please let us know!
Gary
Gary…I left a comment on the old site so this may be a duplicate.
With new 1016 Promaster (136″ HT), I’ll start the floor process next week. I will follow some of your plan…not the spray foam for insulation. Our sounds in the cab when driving are amazingly loud…can’t talk to my wife without yelling. So…thinking of putting down Dynamat to cover the entire floor and some of the interior wall space before doing anything else. Then…insulation with wood slats, polyiso board, plywood and vinyl linoleum, similar to your floor. What do you think of Dynamat Extreme as a noise reducer?
Tem como colocar algum parâmetro de configuração no script do wpad.dat para uma máquina especifica da rede não cair nas regras do proxy? Ou seja, toda a rede vai passar pelo proxy utilizando o wpad, exceto uma máquina especifica. Existe algum parâmetro que eu coloque dentro do script que faça isso?